Opel Corsa B 1993–2000 Service and Repair Manual: Inlet manifold - removal and refitting
Removal
1.4 and 1.6 litre models
1. Refer to the information given, for information on the various electrical components which must be disconnected.
1.8 litre models
2. Disconnect the battery earth lead.
3. Disconnect the injection wiring harness plugs and earth connections as follows:
- Airflow meter plug.
- Coolant temperature sensor (see illustration).
- Fuel injectors (see illustration).
- Throttle valve switch (see illustration).
- Auxiliary air valve (see illustration).
- Cam cover earth tags.

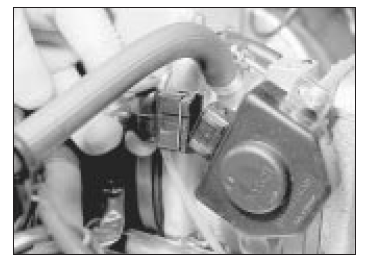
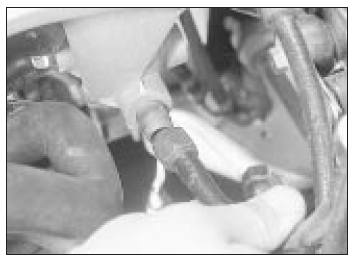
Coolant temperature sensor plug
(arrowed)

Disconnecting a fuel injector plug
Unplugging the throttle valve switch
lead connector
Unplugging the auxiliary air valve
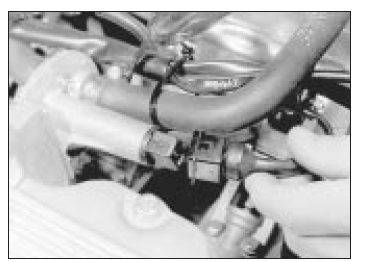
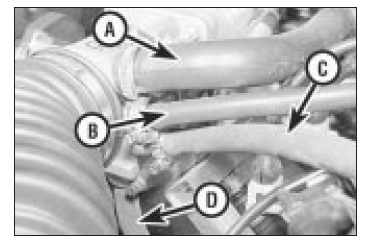
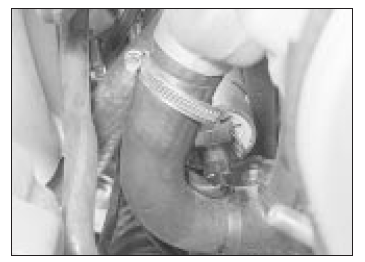
4. Disconnect the distributor vacuum hose from the throttle valve housing (see illustration).
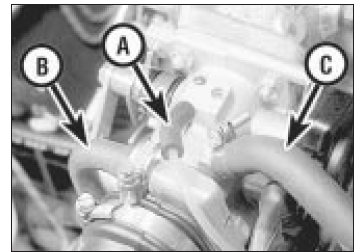
Distributor vacuum hose (A), coolant
hose (B) and breather (C) on throttle housing
5. Depressurise the cooling system by unscrewing the expansion tank cap, taking precautions against scalding if the system is hot. Disconnect and plug the coolant hoses from the throttle valve housing.
6. Disconnect the air inlet duct from the housing.
7. Disconnect the brake servo and crankcase ventilation hoses from the housing.
8. Disconnect and plug the fuel hoses from the fuel rail stubs. The hoses are different sizes and one of them carries a white band for identification. Be prepared for fuel spillage.
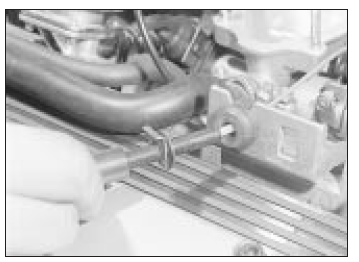
9. Disconnect the accelerator cable from the throttle levers. The cable inner is secured by a wire clip, and the outer is retained in its bracket by an E-clip (see illustration).
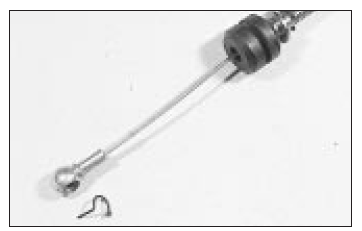
Accelerator cable at engine end
10. Unscrew the nuts which secure the inlet manifold to the cylinder head. The lower nuts are different to reach: a small socket or ring spanner will be needed.
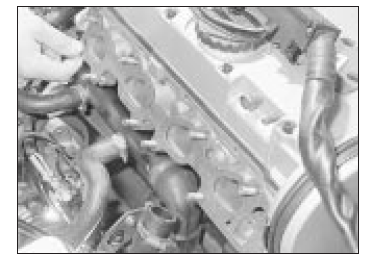
11. Lift away the manifold and recover the gasket (see illustrations).
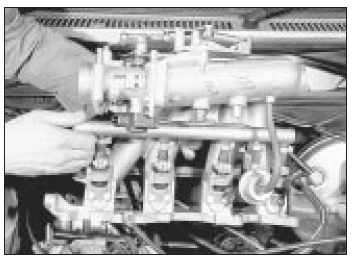
Removing the inlet manifold -
1.8 litre model
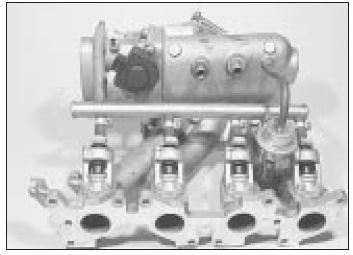
Inlet manifold showing injectors
fuel rail and associated components
2.0 litre 8-valve models
12. Refer to the information given above in paragraphs 2 to 11, noting the hose connections shown (see illustration).
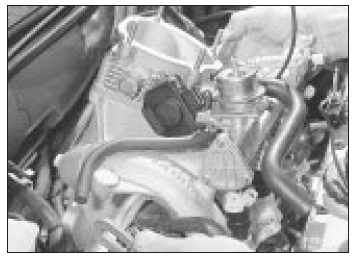
Throttle valve housing - ML4.1
- Hose from idle speed adjuster
- Crankcase ventilation hose
- Coolant hose
- Coolant hose
2.0 litre 16-valve models
13. Disconnect the battery earth (negative) lead.
14. Drain the cooling system.
15. Remove the pre-volume chamber, the air mass meter and its trunking.
16. Remove the alternator drivebelt and the adjuster strap nut and bolt.
17. Disconnect the throttle cable from the throttle housing. Pull the cable out of the retainer and move it aside (see illustration).
Pulling the throttle cable out of the
retainer
18. Remove the 9 nuts which secure the manifold to the cylinder head. These are all stiff and some are not easily accessible; a socket with a "wobble drive" or universal joint will be needed. Once the nuts are removed, slide the manifold back on its studs to improve access to the injector wiring rail.
19. Disconnect the two breather hoses from the camshaft cover.
20. Disconnect the injector wiring rail from the injectors as described earlier.
21. Release the earth straps from each end of the fuel rail.
22. If a vent valve is fitted, disconnect the multi-plug and the hose from it.
23. Disconnect the throttle position switch multi-plug.
24. Bearing in mind the information given, disconnect the fuel supply and return unions from the fuel rail. Be prepared for fuel spillage.
25. Release the fuel supply hose bracket from the throttle housing.
26. Release the cable tie which secures the coolant hoses to the right-hand side of the manifold.
27. Disconnect the brake servo vacuum hose and the large coolant hose from the base of the manifold (see illustrations).
Disconnect the brake servo
hose . . .
. . . and the large coolant hose
28. Unhook the clutch cable from the bracket behind the manifold.
29. Disconnect the small coolant hose from the expansion tank.
30. Disconnect the air hose which connects the idle speed adjuster to the base of the manifold.
31. With the help of an assistant, lift the manifold to gain access to the idle speed adjuster and the knock sensor. Disconnect the multiplugs from these components and feed the wiring harness back through the manifold.
32. Remove the manifold complete with fuel rail and injectors (see illustration). Recover the gasket.
Removing the inlet manifold - 2. litre
16-valve model
Refitting
33. Refitting is the reverse of the removal procedure, noting the following points:
- Use a new manifold gasket (see illustration).
- Tighten the manifold nuts to the specified torque.
- Refill and bleed the cooling system.
Fitting a new inlet manifold gasket
 Multi-point fuel injection
system components (1.8 and
2.0 litre models) - removal and
refitting
Multi-point fuel injection
system components (1.8 and
2.0 litre models) - removal and
refitting
1.8 litre models
Throttle valve switch
1. Disconnect the battery and proceed as
described under the relevant sub-heading.
2. Disconnect the wiring plug from the switch.
3. Remove the two mounting ...
 Exhaust manifold - removal
and refitting
Exhaust manifold - removal
and refitting
Removal
2.0 litre 16-valve models
1. Raise and securely support the front of the vehicle.
2. Disconnect the battery earth (negative)
lead.
3. Remove the manifold heat shield, which is
secured by ...
See also:
Opel Corsa B 1993–2000 Service and Repair Manual. Front brake pads - renewal
Warning: Renew both sets of
front brake pads at the same
time - never renew the pads on
only one wheel as uneven
braking may result. Note that the dust
created by wear of the pads may contain
as ...
