Opel Corsa B 1993–2000 Service and Repair Manual: Rear brake shoes - renewal
Warning: Drum brake shoes must be renewed on both rear wheels at the same time - never renew the shoes on only one wheel as uneven braking may result. Also, the dust created by wear of the shoes may contain asbestos, which is a health hazard Never blow it out with compressed air and don't inhale any of it. An approved filtering mask should be worn when working on the brakes. DO NOT use petroleum based solvents to clean brake parts. Use brake cleaner or methylated spirit only.
1. Remove the brake drum.
2. Working carefully and taking the necessary precautions, remove all traces of brake dust from the brake drum, backplate and shoes.
3. Measure the depth from the friction material to each of the rivets. If this is equal or less than the specified minimum, all four shoes must be renewed as a set. Also, the shoes should be renewed if any are fouled with oil or grease; there is no satisfactory way of degreasing friction material once contaminated.
4. If any of the brake shoes are worn unevenly or fouled with oil or grease, trace and rectify the cause before reassembly. If the shoes are to be renewed proceed as described below. If all is well refit the drums.
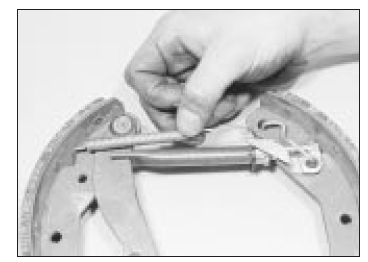
5. Remove the steady pins, springs and washers by depressing the washers and turning them anti-clockwise. Renew them if they are damaged (see illustrations).

Rear brake components with drum removed
- Strut
- Thermoclip
- Adjuster pinion
- Adjuster lever
- Adjuster lever spring
- Adjuster lever bracket
- Handbrake lever
- Upper return spring
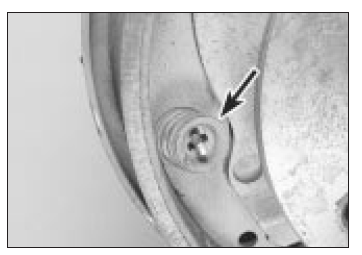
Brake shoe steady pin and washer
(arrowed)
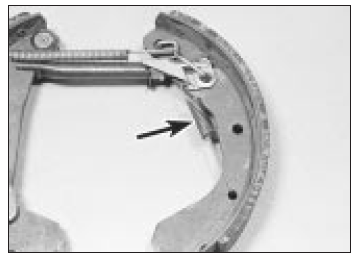
6. Disconnect the handbrake cable from the operating lever (see illustration). If there is insufficient slack at the cable, disconnect it at the equaliser yoke

Handbrake cable attachment to
operating lever (arrowed)
7. The return springs may be unhooked now and the shoes removed separately, or the assembly of shoes, strut and springs may be removed together. The second course is particularly easy if the hub is removed, as has been done for some of the photographs. Be careful not to damage the wheel cylinder rubber boots.
8. If the shoes are to be removed for some time, secure the wheel cylinder pistons with a stout rubber band or a spring clip. In any event, do not press the brake pedal while the drum is removed.
9. Clean the brake backplate, again being careful not to inhale the dust or to disperse it into the air 10 Apply a smear of copper-based anti-seize compound to the shoe rubbing areas on the backplate.
11. Investigate and rectify any source of contamination of the linings (wheel cylinder or hub bearing oil seal leaking).
12. Unusually, linings are still available separately for these brake shoes. Renewal of the shoes complete with linings is to be preferred, however, unless the reader has the necessary skills and equipment to fit new linings to the old shoes.
13. Dismantle the shoes, strut and springs.
Note how the springs are fitted, and which way round the strut goes. Be careful not to interchange left-hand and right-hand adjuster components; the threaded rod is marked L or R, and the other 'handed' components are colourcoded: black for the left-hand side, and silver for the right (see illustration).
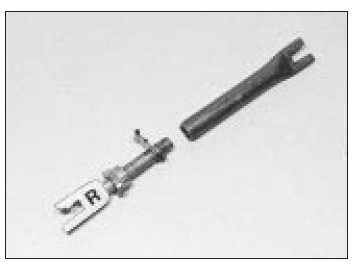
Self-adjusting strut components
right-hand side
14. Dismantle and clean the adjusting strut.
Apply a smear of silicone-based lubricant to the adjuster threads. If new brake linings are being fitted, the thermoclip (in the middle of the strut) must be renewed too.
15. Examine the shoe return springs. If they are distorted or if they have seen much service, renewal is advisable. Weak springs may cause the brakes to bind.
16. If a new handbrake lever was not supplied with the new shoes, transfer the old lever. It may be secured with a pin and circlip (see illustration), or by a rivet which will have to be drilled out.
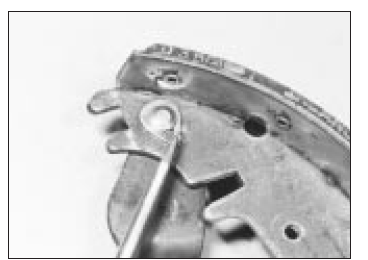
Handbrake lever secured by pin
17. Assemble the new shoes, springs and adjuster components. Expand the adjuster strut to ease fitting (see illustrations).
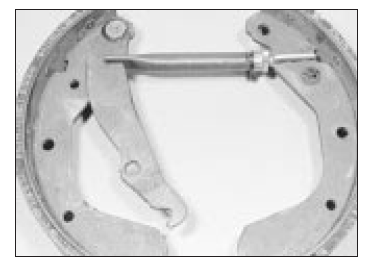
Self-adjusting strut correctly fitted
Fitting the upper return spring to the adjuster lever bracket
Adjuster lever spring (arrowed) fitted
18. Offer the shoes to the brake backplate. Be careful not to damage the wheel cylinder boots or to displace the pistons. Remember to remove the rubber band or spring clip from the wheel cylinder, if one was used.
19. When the shoes are in position, insert the steady pins and secure them with the springs and washers. Reconnect the handbrake cable, and refit and adjust the hub if it was removed.
20. If fitting the shoes and springs together is found too difficult, it is possible to fit the shoes and secure them with the steady pins, then to introduce the adjuster strut and fit the springs and adjuster.
21. Back off the adjuster pinion to reduce the length of the strut until the brake drum will pass over the new linings. Make sure that the handbrake lever is correctly positioned (pin on the edge of the shoe web, not on top of it).
22. Refit and secure the brake drum.
23. Repeat the operations on the other rear brake, then adjust the brakes by operating the footbrake at least 15 times. A clicking noise will be heard at the drums as the automatic adjusters operate; when the clicking stops, adjustment is complete.
24. Check the handbrake adjustment and correct it if necessary.
25. When new linings have been fitted, avoid harsh braking (if possible) for the first hundred miles or so to allow the linings to bed in.
 Rear brake pads - renewal
Warning: Disc brake pads must
be renewed on both rear wheels
at the same time. Never renew
the pads on only one wheel as
uneven braking may result. Also, the dust
created by wear of the pads may ...
 Front brake disc - inspection,
removal and refitting
Front brake disc - inspection,
removal and refitting
Note: Before starting work, refer to the note at
the beginning of Section 4 concerning the
dangers of asbestos dust.
Inspection
Note: If either disc requires renewal, both
should be renewed at th ...
See also:
Opel Corsa Owners Manual. Headlights when driving abroad
The asymmetrical headlight beam
extends visibility at the edge of the
road at the passenger side.
However, when driving in countries
where traffic drives on the opposite
side of the road, adjust ...
