Opel Corsa B 1993–2000 Service and Repair Manual: Bulbs - renewal
General
1. Whenever a bulb is renewed, note the following points.
- Disconnect the battery negative lead before starting work.
- Remember that if the light has just been in use the bulb may be extremely hot.
- Always check the bulb contacts and holder, ensuring that there is clean metalto- metal contact between the bulb and its live(s) and earth. Clean off any corrosion or dirt before fitting a new bulb.
- Wherever bayonet-type bulbs are fitted (see Specifications) ensure that the live contact(s) bear firmly against the bulb contact.
- Always ensure that the new bulb is of the correct rating and that it is completely clean before fitting it; this applies particularly to headlight/foglight bulbs.
Headlamp
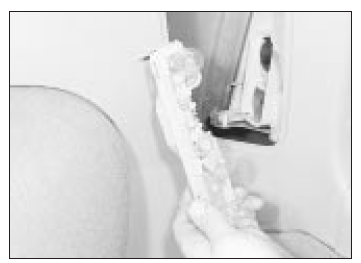
2. Open the bonnet and disconnect the wiring plug from the rear of the headlamp unit.
Remove the rubber cover to expose the spring clip which secures the bulb (see illustrations).
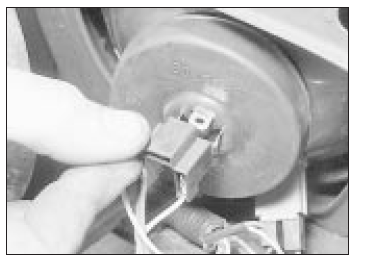
Disconnecting the headlamp wiring
plug
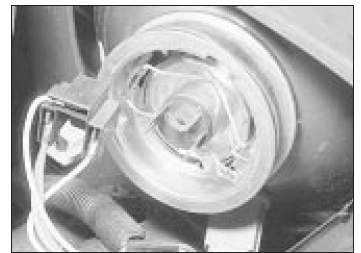
Rubber cover removed to expose the
spring clip
3. Release the spring clip and withdraw the bulb (see illustration). Be careful if it has just been in use, it may be very hot.

Removing a headlamp bulb
4. Do not touch the bulb glass with the fingers: traces of grease can blacken the glass and shorten bulb life. Use a clean cloth moistened with methylated spirit to clean a bulb which has been accidentally touched.
5. Fit the new bulb in the reverse order to removal. Make sure that the lugs on the bulb engage in the recesses in the bulb holder.
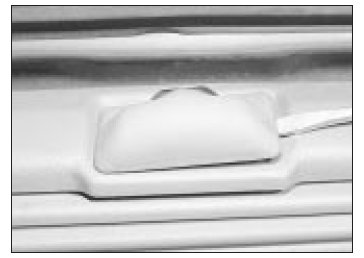
Sidelamp (front parking lamp)
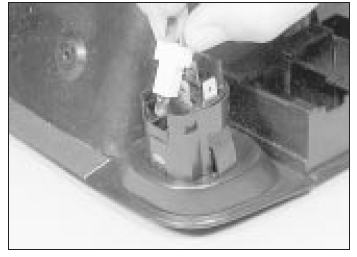
6. Open the bonnet and disconnect the wiring plug from the sidelamp bulb holder.
7. Remove the bulb holder by depressing it and twisting it anti-clockwise (see illustration).

Removing a sidelamp bulb and holder
8. Extract the old bulb from the holder and insert the new one. Refit and reconnect the bulb holder.
Front direction indicator
9. Open the bonnet. Remove the bulb holder by squeezing its legs together and twisting it anti-clockwise (see illustration).
10. Fit the new bulb and refit the bulb holder.
Removing a direction indicator bulb
and holder
Front foglamp
11. Working under the front bumper, remove the rear cover from the lamp unit by twisting it anti-clockwise.
12. Unclip and remove the bulb, separating its electrical connector at the first junction, not at the bulb itself.
13. Do not touch the bulb glass: see paragraph 4.
14. Connect the new bulb. secure it and refit the lamp cover.
Rear lamp cluster
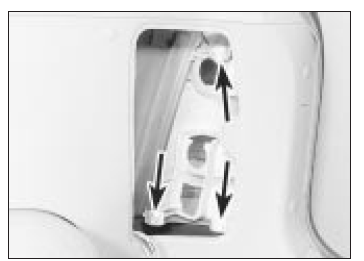
15. Remove the trim panel or access cover from the area of the rear lamp cluster.
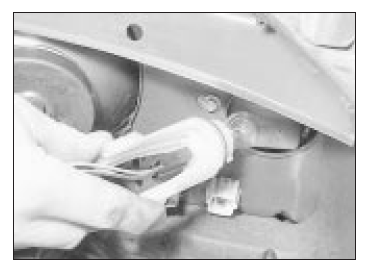
16. Disconnect the wiring plug, depress the bulb holder retaining lug And withdraw the bulb holder (see illustrations).
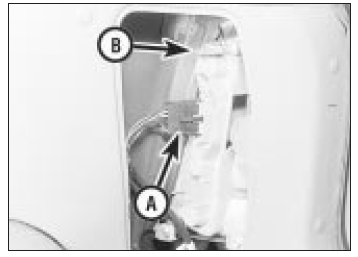
Rear lamp cluster wiring plug (A)
and retaining lug (B)
Rear lamp cluster bulbs and holder
17. The rear lamp unit itself can be removed after undoing the three retaining screws (two on Estates) (see illustrations).
Rear lamp unit retaining screws (arrowed) Hatchback
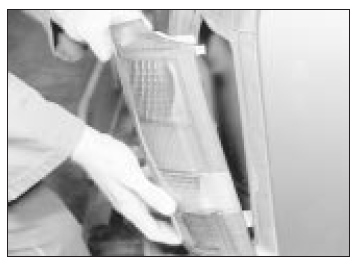
Removing a rear lamp lens
18. Refit in the reverse order to removal. If the lamp unit has been removed, make sure its retaining plates are correctly fitted before tightening the retaining screws.
Rear foglamp
19. Remove the lens from the foglamp by undoing its two retaining screws (see illustration).
20. Extract the bayonet fitting bulb and fit the new one.
21. Refit and secure the lens.
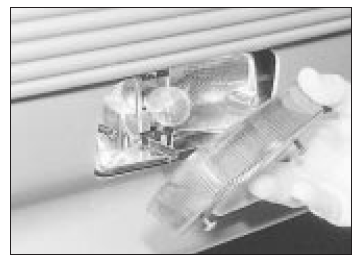
Removing a rear foglamp lens
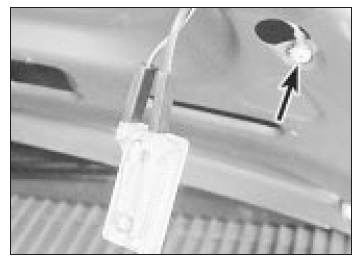
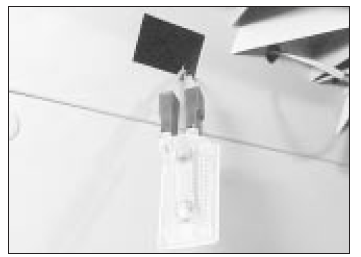
Number plate lamp
22. Prise the lamp unit out of the rear bumper and disconnect its wiring plug (see illustration).
Prising out the number plate lamp
23. Unclip the two halves of the lamp unit to gain access to the bulb (see illustration).
24. Refit in the reverse order to removal.

Number plate lamp bulb holder and
lens separated
Interior lamps
25. Bulb renewal is similar for all types of interior lamp, and for the under-bonnet lamp (when fitted). Either unclip the lamp cover, or carefully prise the lamp unit from its location (see illustrations).
26. Extract the old bulb. fit the new one and refit the lamp or cover.
Under-bonnet lamp unclipped note earth screw (arrowed)
Luggage area lamp unclipped

Removing the cover from the main
interior lamp
Instrument illumination and warning lamps
27. Instrument panel illumination and warning lamp bulbs can be removed by turning the combined bulbholder assembly anticlockwise and withdrawing it from the rear of the panel (see illustration). There is no need to withdraw the panel completely to do this - just withdraw it far enough to gain access to the printed circuit.
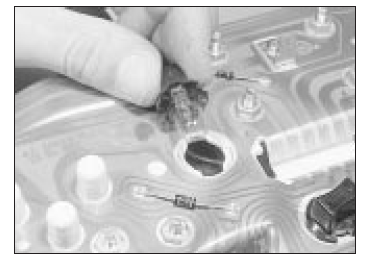
Removing an instrument panel bulb
Switch illumination bulbs
28. Switches such as the lighting master switch and the heated rear window/heater blower control are illuminated by bulbs which can be renewed after removal of the switch (see illustration).
Removing a switch illumination bulb
29. The pilot illumination in switches such as that controlling the foglamps is integral with the switch and cannot be renewed separately.
Check control display lamps
30. Carefully prise the check control unit from its location. The bulb holders are accessible from below.
31. Refit in the reverse order to removal.
 Speedometer cable - removal
and refitting
Speedometer cable - removal
and refitting
Removal
1. A mechanical cable is not used with the
LCD instrument panel; the electrical sender
bolts onto the gearbox in the same position as
the conventional cable.
2. To renew a mechanical cabl ...
 Headlamp/direction indicator
lens assembly - removal and
refitting
Headlamp/direction indicator
lens assembly - removal and
refitting
Removal
1. Remove the direction indicator, headlamp
and sidelamp bulbs.
2. Undo the securing screw and withdraw the
direction indicator lens (see illustrations).
Undoing a direction indicator ...
See also:
Opel Corsa Owners Manual. Parking assist
Parking assist
The parking assist makes parking
easier by measuring the distance
between the vehicle and obstacles. It
is the driver, however, who bears full
responsibility for parking.
The sy ...
