Opel Corsa B 1993–2000 Service and Repair Manual: Oil pump - removal and refitting
Removal
1. Remove the camshaft toothed belt and the sump.
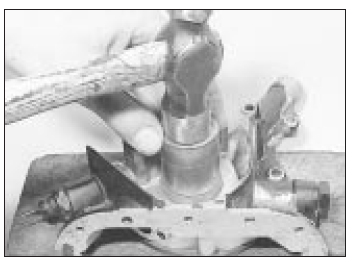
2. Slacken and remove the crankshaft sprocket centre bolt and remove the sprocket and spacers, noting their correct fitted locations. Extract the Woodruff key (where fitted) (see illustrations).
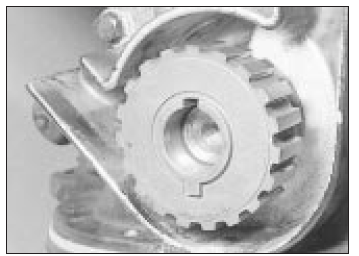
Removing the crankshaft sprocket
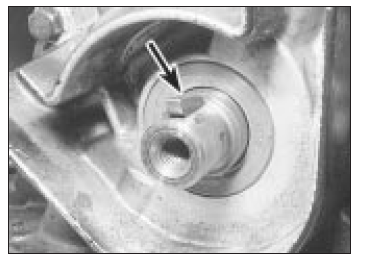
Woodruff key (arrowed) in
crankshaft nose
3. Undo the retaining bolts and remove the toothed belt cover backplate. On later models, in order to remove the backplate it will first be necessary to remove the remaining camshaft toothed belt sprockets to allow this.
4. Undo the two bolts securing the oil pick-up pipe to the oil pump housing and the bolt securing the support bracket to the centre main bearing cap (see illustration). Remove the pick-up pipe. On models with an oil cooler, slacken the union nuts and disconnect the pipes from the oil pump housing.
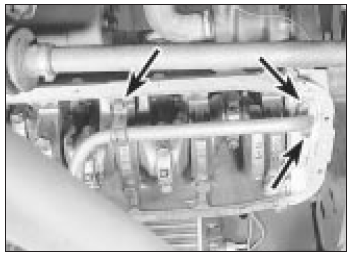
Oil pick-up pipe retaining bolts
(arrowed)
5. Undo the retaining bolts and withdraw the oil pump housing from the front of the engine.
Refitting
6. Refitting is the reverse of removal, noting the following points.
- Ensure that the pump housing mating faces are clean and place a new gasket which is smeared with jointing compound on both sides in position.
- Steps must be taken to protect the seal lips from damage or turning back on the shoulder at the front end of the crankshaft. To do this, grease the seal lips and then bind tape around the crankshaft to form a gentle taper (see illustration).
- Refit the sump and camshaft toothed belt and sprockets as described in earlier Sections of this Chapter.
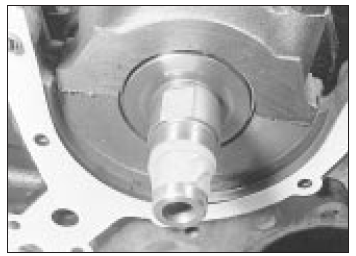
Tape the crankshaft nose
Oil pump - overhaul
1. With the oil pump removed from the vehicle, withdraw the rear cover. The cross-head fixing screws are very tight and an impact driver will be required to remove them (see illustration).
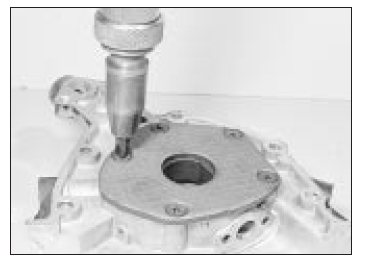
Using an impact screwdriver to undo
the oil pump rear cover screws
2. Check the backlash between the inner and outer gear teeth (see illustration).
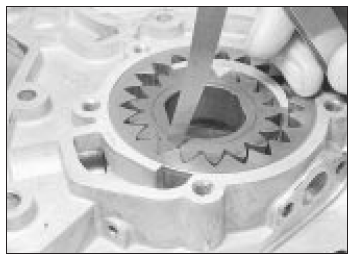
Checking oil pump gear teeth backlash
3. Check the endfloat between the gear outer faces and the housing (see illustration).
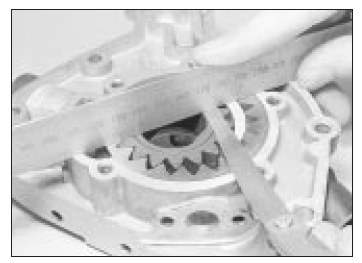
Checking oil pump gear endfloat
4. If any of the clearances are outside the specified tolerance, renew the components as necessary. Note that the outer gear face is marked for position (see illustration).
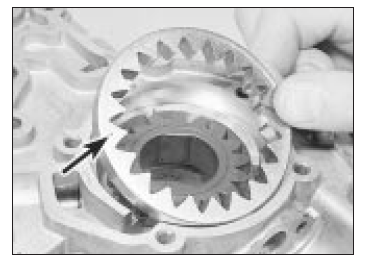
Gear outer face identification mark
(arrowed)
5. The pressure regulator valve can be unscrewed from the oil pump housing and the components cleaned and examined (see illustration).

Oil pressure regulator valve components
6. Always renew the oil seal; a socket is useful to remove and install it (see illustration).
Fitting a new front oil seal
 Sump - removal and refitting
Removal
1. Jack up the front of the car and support it on axle stands.
2. Drain the engine oil into a suitable container
and refit the plug after draining.
3. Unbolt the exhaust downpipe(s) from t ...
 Pistons and connecting rods
- removal and refitting
Pistons and connecting rods
- removal and refitting
The piston crowns are not marked to
show their direction of fitting, but the
underside of the piston is (see illustration).
Large land (arrowed) faces the
flywheel end of the engine
Flywheel ...
See also:
Opel Corsa B 1993–2000 Service and Repair Manual. Reference
General dimensions and Weights
Dimensions and weights
Note: All figures are approximate, and may vary according to model.
Refer to manufacturer's data for exact figures.
Dimensions
Weights
...
