Opel Corsa B 1993–2000 Service and Repair Manual: Cylinder head - overhaul
1. Remove the manifold gaskets
2. Remove the camshafts, slackening the bearing cap nuts progressively until the valve spring pressure is released.
3. Remove the spark plugs.
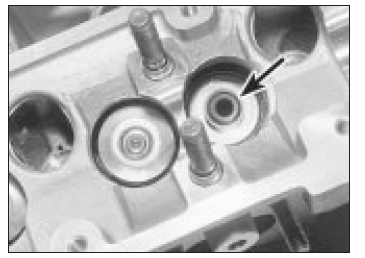
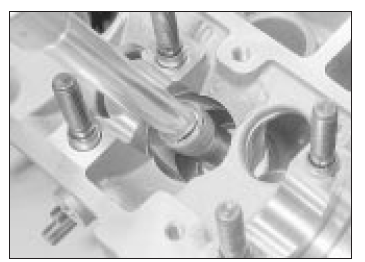
4. Using a sucker or a magnet, remove the hydraulic tappet buckets from their bores (see illustration). If they are to be re-used, keep them in order so that they can be refitted to their original locations. To stop the oil draining out of them, store them in a bath of clean engine oil with the oil ring lowermost.
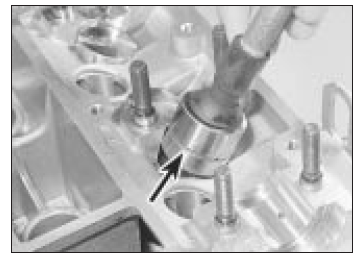
Removing a tappet. Note the oil ring
(arrowed)
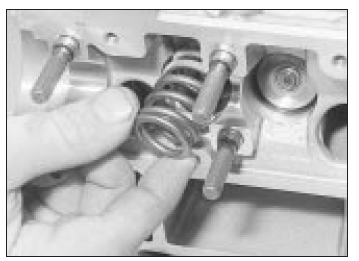
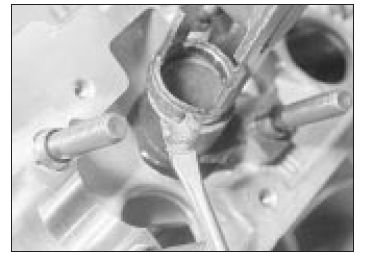
5. Prepare a box with 16 compartments to receive the valve components. Using a valve spring compressor and a piece of tube with two slots cut in it, compress a valve spring (see illustration). Extract the collets from the top of the valve stem using a pencil magnet or a magnetic screwdriver.
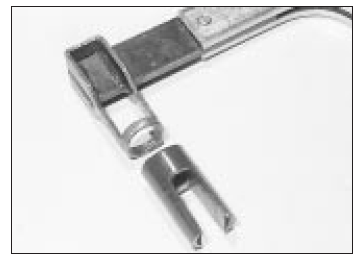
Detail of valve spring compressor
head and tube
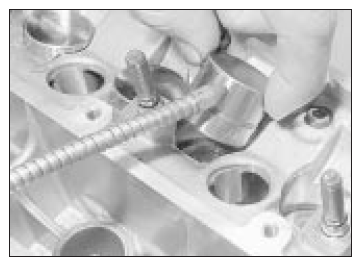
6. Carefully release the compressor and remove the valve, the spring upper seat and the spring. Pull off the valve stem oil seal with longnosed pliers and recover the valve spring seat. Place all the components in the appropriate compartment in the box (see illustrations).
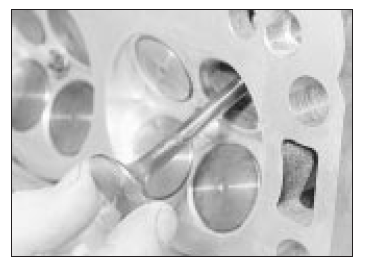
Remove the valve . . .
. . . the spring upper seat . . .
. . . the valve spring . . .
. . . the valve stem oil seal
(arrowed) . . .
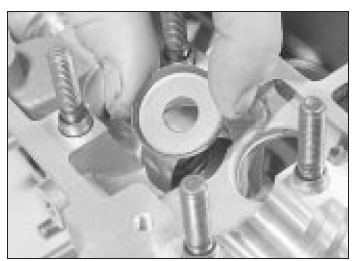
. . . and the valve spring seat
7. Repeat the operations on the other 15 valves.
8. Clean the combustion chambers and the gasket mating faces with a wooden or plastic scraper. Finish up with a rag or toothbrush and a solvent such as a proprietary carburettor cleaner.
9. Inspect the valves, springs and seats. Note however that the exhaust valves on these engines are filled with sodium to improve heat transfer. Sodium is a highly reactive metal which will ignite or explode spontaneously on contact with air or water. Valves containing sodium must not be disposed of in ordinary scrap.
10. Check the head gasket mating face for distortion using a straightedge and feeler blades. Check crosswise, lengthwise and diagonally. Warp limits are given in the Specifications.
11. Inspect the camshafts and their bearing surfaces and caps.
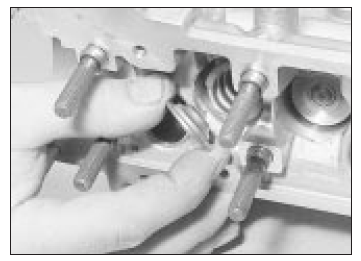
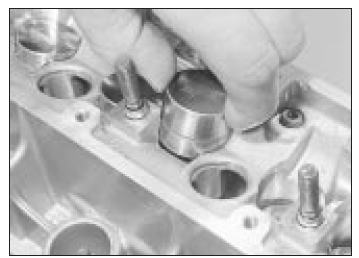
12. Commence reassembly by fitting a valve spring seat to its location. Fit a new valve stem oil seal to the top of the valve guide, using a deep socket or a piece of tube (see illustrations).
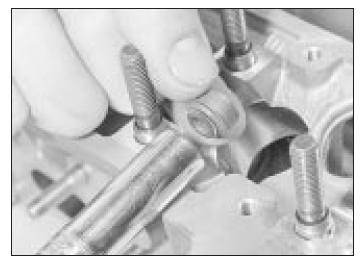
Fit a valve stem oil seal into a socket or tube . . .
. . . and press it home
13. Oil the valve stem and insert the valve into its guide, passing it gently through the stem oil seal to avoid damage. Fit the valve spring and upper seat. Compress the spring and fit the collets using a magnetic screwdriver this is a fiddly business. A dab of grease on each collet will keep them in position on the valve stem (see illustration).
Fitting a valve collet
14. Carefully release the valve spring compressor. Apply a solid tube or piece of wood (eg a hammer handle) to the top of the valve and tap smartly with a hammer to settle the components.
15. Repeat the operations on the other valves.
16. Refit the tappets, with the oil ring lowermost, oiling them generously (see illustrations). If new camshafts are to be fitted, apply some of the assembly lubricant supplied with new camshafts to the top surfaces of the tappets.
Oiling a tappet . . .
. . . and fitting it to its bore
17. Fit the camshafts and their oil seals.
18. The distributor and spark plugs may be refitted now, or if preferred left until after the head has been refitted.
 Cylinder head - removal and
refitting
Cylinder head - removal and
refitting
Note: The procedure described here is the
removal of the cylinder head leaving the inlet
manifold and fuel injection equipment in
place. If preferred, the manifold can be
removed with the head aft ...
 Sump and oil baffle plate -
removal and refitting
Sump and oil baffle plate -
removal and refitting
Removal
1. Raise and support the front of the vehicle.
Disconnect the battery earth (negative) lead.
2. Drain the engine oil.
3. Remove the exhaust manifold.
4. Disconnect the multi-plug from t ...
See also:
Opel Corsa B 1993–2000 Service and Repair Manual. Door inner trim panel -
removal and refitting
Removal
1. Procedure is described for a front door; rear
doors are similar, except where noted.
2. Except on models with electric windows,
the window winder handle must first be
removed. In the a ...
