Opel Corsa B 1993–2000 Service and Repair Manual: Heater/ventilation system - general information
The heater operates by passing fresh air, drawn in from the area at the base of the windscreen, through a matrix which is heated by engine coolant.
Temperature regulation is achieved by mixing hot and cold air. Flap valves are used for this; other flap valves direct the air to the windscreen, floor or side outlets.
An electric fan is used to boost airflow through the heater when the normal ram airflow is insufficient, or in extreme climatic conditions.
Fresh air is available at the centre vents, regardless of the heater settings. Stale air is exhausted through grilles towards the rear of the vehicle.
Heater components - removal and refitting
Control panel
1. Remove the front half of the centre console.
2. Remove the radio (if fitted) and its surround. If a radio is not fitted, remove the blanking plate.
3. Detach the three control cables from the air distribution housing, noting their locations for refitting. Their sleeves are colour-coded as follows (see illustration):
- Brown - Foot level distribution
- White - Hot/Cold air mix
- Black - Screen level distribution
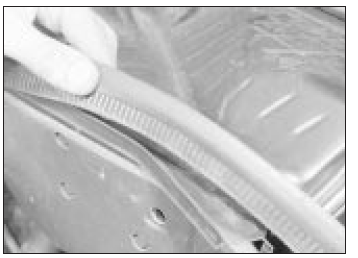
Exploded view of heater components
- Facia panel
- Bulkhead
- Blower motor
- Centre duct
- Centre vent housing
- Swivelling vents
- Controls
- Side grilles
- Side vent housing
- Side vent housing
- Side ducts
- Windscreen ducts
- Air distribution housing (upper half)
- Air distribution housing (lower half)
- Heater matrix
- Air distribution housing cover
- Air mix (temperature) cable
- Upper distribution cable
- Lower distribution cable
- Air mix flaps
- Upper distribution flap
- Lower distribution flap
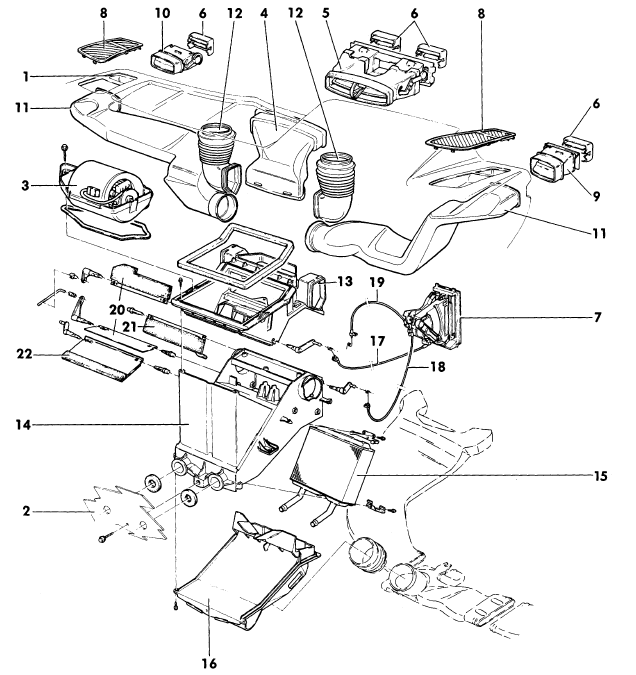
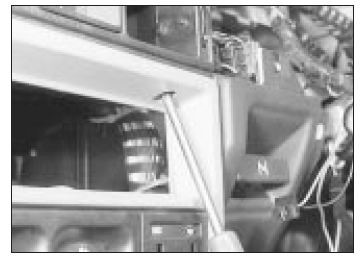
4. Remove the two screws from the top of the radio aperture and the two side screws, one on each side (see illustrations).
Removing a screw from the top of the radio aperture
Heater control panel side screw
5. Draw the control panel away (see illustration). To remove it completely, disconnect the wires from the blower switch and (when fitted) the cigarette lighter.

Removing the heater control panel
6. Refit in the reverse order to removal. No adjustment of the cable is required: correct length is achieved by the precise location of the cable outer clamps.
Blower motor
7. Remove the wind deflector.
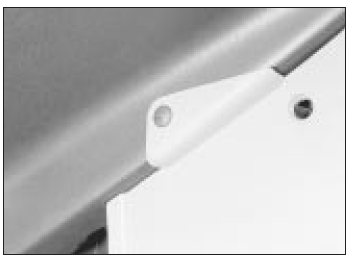
8. Remove the water deflector by freeing it from under the rubber seal and extracting its securing clip (see illustrations). It may also be necessary to slacken or remove one of the wiper spindle nuts.
Lift the rubber seal to free the water
Water deflector clip
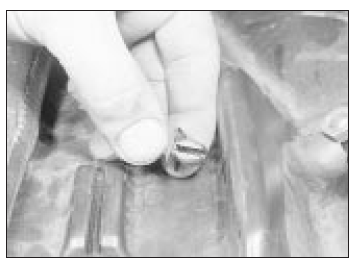
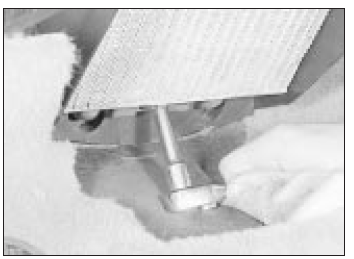
9. Disconnect the multi-plug, remove the two securing nuts and remove the motor (see illustration).
Removing a blower motor securing nut
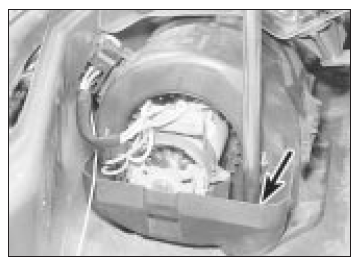
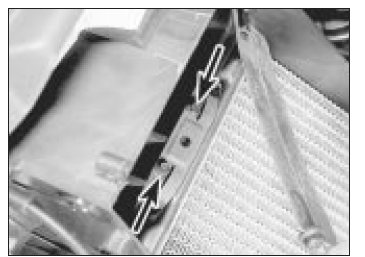
10. If the housing halves are unclipped, the motor and ballast resistor can be removed by undoing the two screws at the resistor end (see illustration). Spares for the meter are not available, but a competent auto-electrician may be able to repair certain types of fault.
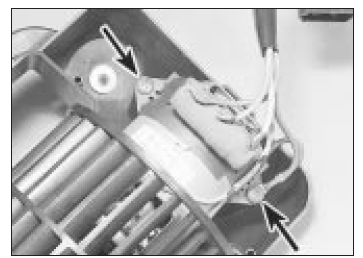
Blower motor-to-housing screws
(arrowed)
11. Refit in the reverse order to removal.
Heater matrix
12. Remove the front half of the centre console.
13. Disconnect the control cables from the air distribution housing. Removal of the heater control panel is recommended, as described earlier in this Section, to improve access.
14. Under the bonnet, clamp the coolant hoses at the heater matrix stubs (below the steering rack) and disconnect them. Be prepared for coolant spillage.
15. Remove the four screws which secure the air distribution housing cover (see illustrations). The carpet will have to be turned back to get at the lower ones.
Removing an air distribution
housing upper screw
Air distribution housing lower screw
(arrowed)
16. Disconnect the rear heating duct bellows, when fitted, and remove the air distributor housing cover.
17. Remove the three screws which secure the heater matrix (see illustrations). The air mix flap will have to be moved in order to get at the top two screws. Remove the matrix brackets.
Removing the heater matrix lower
screw
Heater matrix upper securing
screws (arrowed)
18. Withdraw the matrix into the car, keeping it as flat as possible to minimise coolant spillage.
19. Refit in the reverse order to removal; topup the cooling system on completion (Weekly checks).
Air distribution housing
20. Remove the blower motor and the heater matrix, as described earlier in this Section.
21. Remove the five nuts which secure the facia panel and the pedal bracket to the bulkhead.
22. Remove the steering column switch shrouds. On models with an adjustable column, also remove the adjuster knob and the column lower cover.
23. Disconnect the hoses and ducts which connect the air distribution housing to the facia panel ducts.
24. Remove the two remaining screws, one at each end, which secure the facia panel. Pull the facia panel away on the passenger side and have an assistant withdraw the air distribution housing, also towards the passenger side.
25. Refit in the reverse order to removal. Use new self-locking nuts when securing the facia panel and pedal bracket to the bulkhead.
26. Top-up the cooling system on completion.
 Cooling system electrical
switches - testing, removal and
refitting
Cooling system electrical
switches - testing, removal and
refitting
Electric cooling fan thermostatic
switch
Testing
1. Testing of the switch as part of the fan test procedure.
Removal
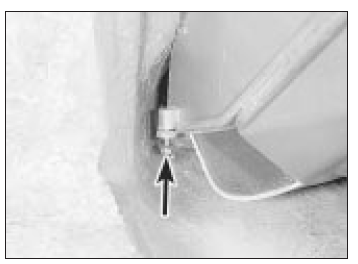
2. The switch is located in the side of the
radiator (see illustration). The ...
 Vents and grilles - removal
and refitting
Vents and grilles - removal
and refitting
1. The flat grilles at each end of the facia
simply unclip. According to equipment level
they may also cover a loudspeaker (see
illustration).
Removing an end grille and speaker
2. The swivel ...
See also:
Opel Corsa B 1993–2000 Service and Repair Manual. Door - removal and refitting
Removal
1. The door hinges are welded onto the door
and onto the hinge pillar. The only remedy for
worn hinges, unless oversize pins can be
procured, is to renew the door and/or pillar.
2. To rem ...
