Opel Corsa B 1993–2000 Service and Repair Manual: Engine - removal and refitting
Removal
1. The OHC engines may be removed either with or without the manual gearbox. To remove the engine alone, making allowances for differences in the attachment of components such as the carburettor or fuel injection items.
2. Removal of the engine and automatic transmission together may be possible, but it is not recommended because of the weight and unwieldiness of the combined units.
3. To remove the engine and manual gearbox together, first disconnect both battery terminals. Remove the bonnet .
4. Remove the air cleaner.
5. Drain the cooling system. Disconnect all coolant hoses from the engine, not forgetting the heater hoses and (if fitted) the inlet manifold/carburettor heating hoses.
6. Disconnect the throttle cable and (if fitted) the choke cable.
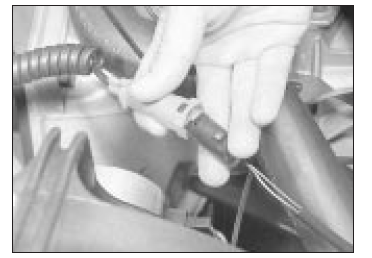
7. Disconnect the brake servo vacuum hose.
Either remove the hose completely, or secure it so that it will not be damaged.
8. Disconnect and plug the fuel feed and return lines. Be prepared for some fuel spillage.
9. Disconnect the engine wiring harness plug.
On models so equipped, disconnect the dipstick sensor wiring also (see illustrations).
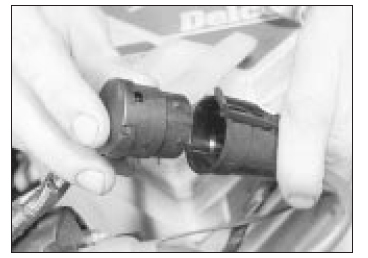
Engine wiring harness plug
Dipstick sensor plug
10. Disconnect the HT lead, LT leads and multi-plug from the ignition coil and module.
11. Disconnect the gearchange remote control rod at the pinch-bolt.
12. Disconnect the speedometer cable at the gearbox end.
13. Disconnect the clutch cable.
14. Slacken the front wheel bolts, raise and securely support the front of the car and remove the front wheels.
15. Unbolt and remove the exhaust downpipe(s). Also disconnect the earth strap from the gearbox.
16.Where applicable, disconnect the oil cooler hoses from the oil filter housing. Be prepared for some oil spillage and plug the hoses.
17. Separate the control arm balljoints from the steering knuckles.
18. Separate the driveshafts from the final drive housing. Be prepared for some oil spillage; plug the driveshaft holes and tie the shafts up out of the way.
19. Attach the lifting tackle to the engine and gearbox and take the weight of the assembly.
20. Unbolt the engine/transmission mountings from the body members (see illustrations).
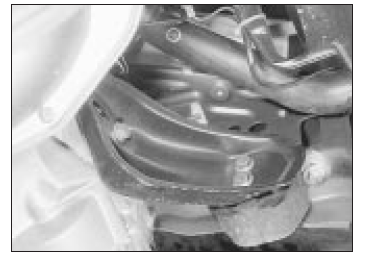
Engine/transmission left-hand
mounting
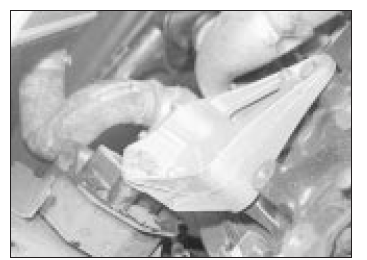
Engine/transmission right-hand
mounting
21. Carefully lower the assembly through the engine bay to the ground. Depending on the type and reach of the vehicle lifting gear, it may be necessary to lift the vehicle off the engine to enable it to be withdrawn.
22. To separate the engine and gearbox. support the latter and unbolt the starter motor and flywheel bottom cover. Remove the remaining engine-to-bellhousing bolts and carefully withdraw the gearbox from the engine. Do not allow the weight of the gearbox to hang on the clutch input shaft.
Refitting
23. When refitting, tighten the engine/transmission mounting bolts finger tight at first, then to the specified torque, in the following order:
- RH front mounting.
- LH front mounting.
- Rear mounting.
24. The remainder of the refitting process follows the reverse order to removal. Refer to the appropriate Chapters for guidance if necessary. Remember to replenish the gearbox oil after refitting.
Engine - initial start-up after overhaul
There is no need to adjust the valve clearances, but remember to tighten the head bolts if the head has been disturbed. Expect some initial noise from the hydraulic valve lifters, until they are properly pressurised with oil.
 Engine lubrication and
crankcase ventilation systems -
general description
Engine lubrication and
crankcase ventilation systems -
general description
1. Oil pressure for all moving components is
provided by a gear type oil pump which is
driven from the front end of the crankshaft.
The crankshaft has flats for this purpose.
2. The pump draws o ...
 DOHC (16-valve) engine
Specifications
General
Cylinder block
Crankshaft
Pistons and piston rings
Gudgeon pins
Cylinder head
Camshafts
Valves
Torque wrench setting ...
See also:
Opel Corsa B 1993–2000 Service and Repair Manual. Body electrical system
Specifications
General
Fuses - early models
Fuses - early models
Bulbs
...
