Opel Corsa B 1993–2000 Service and Repair Manual: 32 TL carburettor - overhaul
Note: In the rare event of a complete carburettor overhaul being necessary, it may prove more economical to renew the carburettor as a complete unit. Check the price and availability of a replacement carburettor and of its component parts before starting work; note that most sealing washers, screws and gaskets are available in kits, as are some of the major sub-assemblies. In most cases it will be sufficient to dismantle the carburettor and to clean the jets and passages.
1. Remove the carburettor from the engine.
2. Clean the carburettor externally using a suitable cleaning solvent, or petrol in a well ventilated area. Wipe the carburettor dry with a lint-free cloth and prepare a clean uncluttered working area.
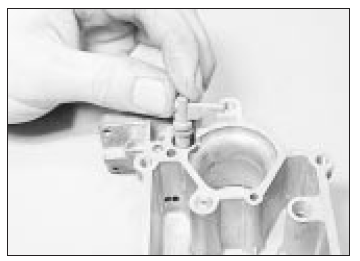
3. Disconnect the throttle return spring from the linkage and the support bracket on the side of the carburettor (see illustration).
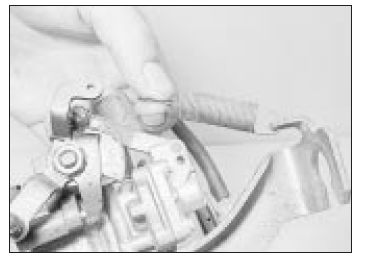
Removing the throttle return spring
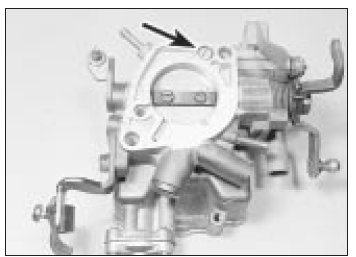
4. Disconnect the vacuum unit hose from the outlet on the throttle valve housing (see illustration).
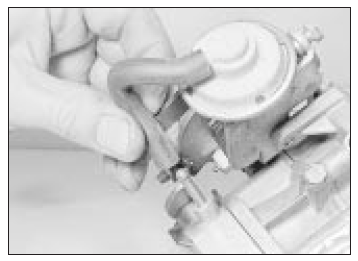
Disconnecting the vacuum hose
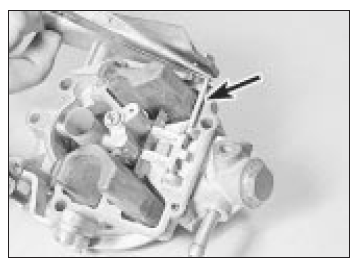
5. Undo the four retaining screws and separate the carburettor cover from the float chamber housing (see illustrations).
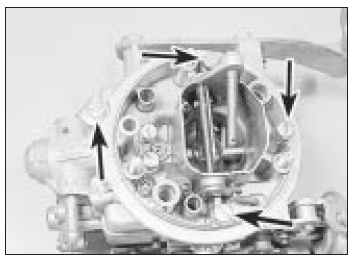
Four screws (arrowed) secure the
carburettor cover to the float chamber
housing
Separating the cover from the float
chamber housing
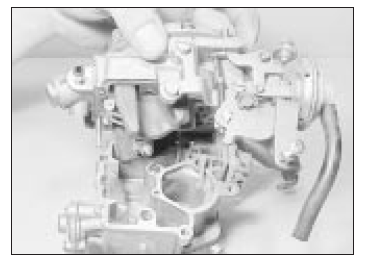
6. At the base of the carburettor undo the single securing the throttle valve housing to the float chamber housing (see illustration).
Separate the two housings.
Undo the screw (arrowed) to
separate the throttle valve and float
chamber housings
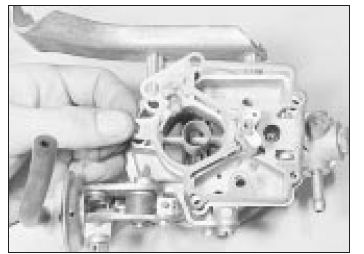
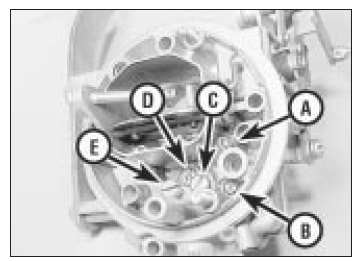
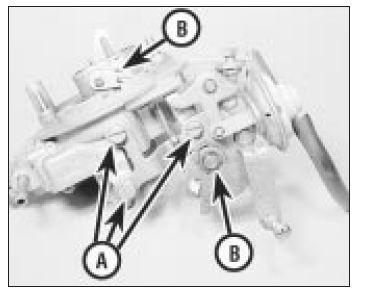
7. Undo the screw securing the choke cable support bracket to the throttle valve housing and lift off the bracket. Undo the blanking plug and remove the seal ring from the housing (see illustration).
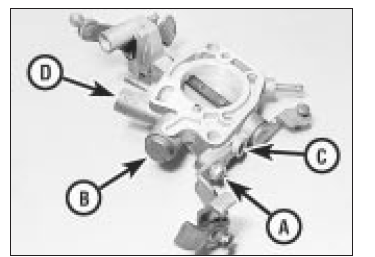
Throttle valve housing components
support bracket screw (A), blanking plug
(B), idle mixture screw (C) and idle speed
screw (D)
8. As a guide to refitting, count and record the number of turns necessary to screw the auxiliary idle mixture screw and the basic idle mixture screw fully into the housing. Now remove the two screws.
9. Undo the four screws and remove the accelerator pump cover, diaphragm, and spring from the float chamber housing (see illustration).
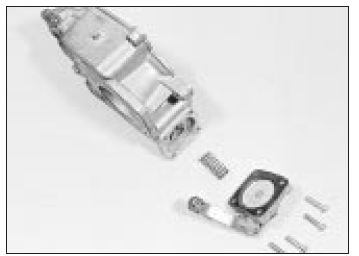
Accelerator pump components
10. From the other side of the float chamber housing, undo the three screws and remove the enrichment valve cover, diaphragm and spring (see illustration).
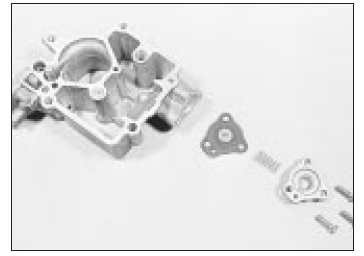
Enrichment valve components
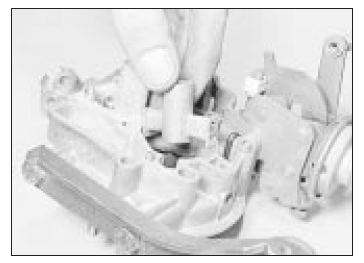
11. Carefully withdraw the fuel discharge nozzle from the housing (see illustration).
Removing the fuel discharge nozzle
12. Tap the float pivot pin out of the pivot posts and withdraw the pin using long-nosed pliers (see illustration).
Extracting the float pivot pin
13. Lift out the float and then remove the gasket from the carburettor top cover (see illustration).
Lift off the gasket
14. Lift out the float needle valve and then unscrew the main jet (see illustration).

Removing the float needle valve.
Main jet is arrowed
15. Unscrew all the jets and plugs from the carburettor cover, making a careful note of their locations (see illustration). Remove the mixture tube from the air correction jet bore.
Plugs (A and B), idle jet (C), air
correction jet (D) and auxiliary fuel/air jet
(E) in carburettor cover
16. Withdraw the pre-atomiser from the top cover venturi (see illustration).
Removing the pre-atomiser
17. Undo the retaining plug and withdraw the fuel filter adjacent to the inlet hose connection on the top cover.
18. If necessary the choke valve operating linkage and vacuum unit can be removed from the top cover. Undo the three retaining screws and the retaining clips for the operating cam and choke valve rod. Remove the cam and spring, disengage the operating rod from the cam and choke valve lever and withdraw the assembly (see illustration).
Choke linkage screws (A) and
retaining clips (B)
19. With the carburettor now dismantled, clean the components in petrol in a well ventilated area. Allow the parts to air dry.
20. Blow out all the jets and the passages in the housings using compressed air or a tyre foot pump. Never probe with wire.
21. Examine the choke and throttle valve spindles and linkages for wear or excessive side-play. If wear is apparent in these areas it is advisable to obtain an exchange carburettor.
22. Check the diaphragms and renew them if they are punctured or show signs of deterioration.
23. Examine the float for signs of deterioration and shake it, listening for fuel inside. If so renew it, as it is leaking and will give an incorrect float level height causing flooding.
24. Blow through the float needle valve assembly while holding the needle valve closed, then open. Renew the valve if faulty, or as a matter of course if high mileages have been covered.
25. Obtain the new parts as necessary and also a carburettor repair kit which will contain a complete set of gaskets, washers and seals.
26. Reassemble the carburettor using the reverse of the dismantling procedures, but carry out the settings and adjustments as the work progresses.
27. Check the float level as shown after refitting the float (see illustration). Bend the float arm if necessary to achieve the specified level.
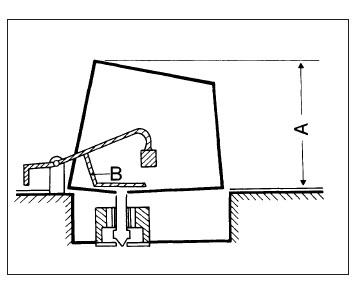
Float level measurement
- Measurement point
- Bend here to adjust
28. After refitting the carburettor, carry out the basic idle adjustment then adjust the idle speed and mixture settings.
 Carburettor - removal and
refitting
Carburettor - removal and
refitting
Note: Refer to the warning note in Section 1
before proceeding.
Removal
1. Disconnect the battery earth lead.
2. Remove the air cleaner.
3. Disconnect the choke cable (manual choke
models) or th ...
 35 PDSI carburettor -
overhaul
35 PDSI carburettor -
overhaul
Note: In the rare event of a complete
carburettor overhaul being necessary, it may
prove more economical to renew the
carburettor as a complete unit. Check the
price and availability of a replacem ...
See also:
Opel Corsa Owners Manual. Low engine oil level, Low fuel, Apply footbrake
Low engine oil level
illuminates yellow.
Engine oil level is checked
automatically.
Illuminates when the engine is
running
Low engine oil level. Check engine oil
level and top u ...
